PyAutoGUI是一个纯Python的GUI自动化工具,其目的是可以用程序自动控制鼠标和键盘操作,多平台支持(Windows,OS X,Linux)。
安装
pip3 install pyautogui
PyAutoGUI【鼠标】操作示例
import pyautogui

# 获取当前屏幕分辨率
screenWidth, screenHeight = pyautogui.size()

# 获取当前鼠标位置
currentMouseX, currentMouseY = pyautogui.position()

# 2秒钟鼠标移动坐标为100,100位置  绝对移动
#pyautogui.moveTo(100, 100,2)
pyautogui.moveTo(x=100, y=100,duration=2, tween=pyautogui.linear)

#鼠标移到屏幕中央。
pyautogui.moveTo(screenWidth / 2, screenHeight / 2)

# 鼠标左击一次
#pyautogui.click()
# x
# y
# clicks 点击次数
# interval点击之间的间隔
# button 'left', 'middle', 'right' 对应鼠标 左 中 右或者取值(1, 2, or 3)
# tween 渐变函数
#
pyautogui.click(x=None, y=None, clicks=1, interval=0.0, button='left', duration=0.0, tween=pyautogui.linear)

# 鼠标相对移动 ,向下移动
#pyautogui.moveRel(None, 10)
pyautogui.moveRel(xOffset=None, yOffset=10,duration=0.0, tween=pyautogui.linear)


# 鼠标当前位置0间隔双击
#pyautogui.doubleClick()
pyautogui.doubleClick(x=None, y=None, interval=0.0, button='left', duration=0.0, tween=pyautogui.linear)

# 鼠标当前位置3击
#pyautogui.tripleClick()
pyautogui.tripleClick(x=None, y=None, interval=0.0, button='left', duration=0.0, tween=pyautogui.linear)

#右击
pyautogui.rightClick()

#中击
pyautogui.middleClick()

#  用缓动/渐变函数让鼠标2秒后移动到(500,500)位置
#  use tweening/easing function to move mouse over 2 seconds.
pyautogui.moveTo(x=500, y=500, duration=2, tween=pyautogui.easeInOutQuad)

#鼠标拖拽
pyautogui.dragTo(x=427, y=535, duration=3,button='left')

#鼠标相对拖拽
pyautogui.dragRel(xOffset=100,yOffset=100,duration=,button='left',mouseDownUp=False)

#鼠标移动到x=1796, y=778位置按下
pyautogui.mouseDown(x=1796, y=778, button='left')

#鼠标移动到x=2745, y=778位置松开(与mouseDown组合使用选中)
pyautogui.mouseUp(x=2745, y=778, button='left',duration=5)

#鼠标当前位置滚轮滚动
pyautogui.scroll()
#鼠标水平滚动(Linux)
pyautogui.hscroll()
#鼠标左右滚动(Linux)
pyautogui.vscroll()
PyAutoGUI【键盘】操作示例
#模拟输入信息
pyautogui.typewrite(message='Hello world!',interval=0.5)
#点击ESC
pyautogui.press('esc')
# 按住shift键
pyautogui.keyDown('shift')
# 放开shift键
pyautogui.keyUp('shift')
# 模拟组合热键
pyautogui.hotkey('ctrl', 'c')
按键支持
| 按键 | 说明 |
|---|---|
enter(或return 或 \n) |
回车 |
esc |
ESC键 |
shiftleft, shiftright |
左右SHIFT键 |
altleft, altright |
左右ALT键 |
ctrlleft, ctrlright |
左右CTRL键 |
tab (\t) |
TAB键 |
backspace, delete |
BACKSPACE 、DELETE键 |
pageup, pagedown |
PAGE UP 和 PAGE DOWN键 |
home, end |
HOME 和 END键 |
up, down, left,right |
箭头键 |
f1, f2, f3…. |
F1…….F12键 |
volumemute, volumedown,volumeup |
有些键盘没有 |
pause |
PAUSE键 |
capslock, numlock,scrolllock |
CAPS LOCK, NUM LOCK, 和 SCROLLLOCK 键 |
insert |
INS或INSERT键 |
printscreen |
PRTSC 或 PRINT SCREEN键 |
winleft, winright |
Win键 |
command |
Mac OS X command键 |
提示信息
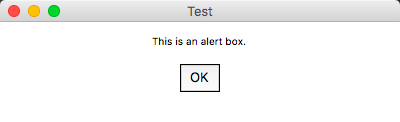
alert
#pyautogui.alert('This is an alert box.','Test')
pyautogui.alert(text='This is an alert box.', title='Test')
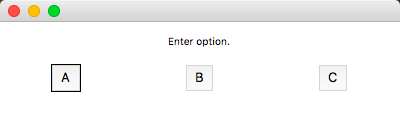
option
#pyautogui.confirm('Shall I proceed?')
pyautogui.confirm('Enter option.', buttons=['A', 'B', 'C'])
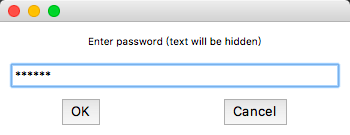
password
a = pyautogui.password('Enter password (text will be hidden)')
print(a)
prompt
a = pyautogui.prompt('input  message')
print(a)

截屏
整个屏幕截图并保存
#在当前屏幕中查找指定图片(图片需要由系统截图功能截取的图)
coords = pyautogui.locateOnScreen('folder.png')
#获取定位到的图中间点坐标
x,y=pyautogui.center(coords)
#右击该坐标点
pyautogui.rightClick(x,y)
屏幕查找图片位置并获取中间点
#在当前屏幕中查找指定图片(图片需要由系统截图功能截取的图)
coords = pyautogui.locateOnScreen('folder.png')
#获取定位到的图中间点坐标
x,y=pyautogui.center(coords)
#右击该坐标点
pyautogui.rightClick(x,y)
安全设置
import pyautogui

#保护措施,避免失控
pyautogui.FAILSAFE = True
#为所有的PyAutoGUI函数增加延迟。默认延迟时间是0.1秒。
pyautogui.PAUSE = 0.5
参考:
https://blog.csdn.net/weixin_43430036/article/details/84650938
https://blog.csdn.net/weixin_43709411/article/details/91526399