在介绍ReplayingDecoder之前,先看一下它的用法,构建一个服务端和客户端的模型:
服务端:
public class MyServer {

    public static void main(String[] args) throws InterruptedException {
        EventLoopGroup bossGroup = new NioEventLoopGroup(1);
        EventLoopGroup workerGroup = new NioEventLoopGroup();
        try{
            ServerBootstrap serverBootstrap = new ServerBootstrap();
            serverBootstrap.group(bossGroup,workerGroup).channel(NioServerSocketChannel.class)
                    .childHandler(new MyServerInitializer());
            ChannelFuture channelFuture = serverBootstrap.bind(8899).sync();
            channelFuture.channel().closeFuture().sync();
        }finally{
            bossGroup.shutdownGracefully();
            workerGroup.shutdownGracefully();
        }
    }
}
服务端initializer:
public class MyServerInitializer extends ChannelInitializer<SocketChannel> {
    @Override
    protected void initChannel(SocketChannel ch) throws Exception {
        ChannelPipeline pipline = ch.pipeline();
        pipline.addLast(new MyReplayingDecoder());//使用ReplayingDecoder
        pipline.addLast(new MyLongToByteEncoder());
        pipline.addLast(new MyServerHandler());
    }
}
ServerHandler:
public class MyServerHandler extends SimpleChannelInboundHandler<Long> {
    @Override
    protected void channelRead0(ChannelHandlerContext ctx, Long msg) throws Exception {
        System.out.println(ctx.channel().remoteAddress()+" --> "+msg);
        ctx.writeAndFlush(654321L);
    }

    @Override
    public void exceptionCaught(ChannelHandlerContext ctx, Throwable cause) throws Exception {
        cause.printStackTrace();
        ctx.close();
    }
}
MyReplayingDecoder:
public class MyReplayingDecoder extends ReplayingDecoder<Void> {

    @Override
    protected void decode(ChannelHandlerContext ctx, ByteBuf in, List<Object> out) throws Exception {
        System.out.println("MyReplayingDecoder decode invoked!");
        out.add(in.readLong()); // 注意没有判断字节数!!!!
    }
}
MyLongToByteEncoder:
public class MyLongToByteEncoder extends MessageToByteEncoder<Long> {
    @Override
    protected void encode(ChannelHandlerContext ctx, Long msg, ByteBuf out) throws Exception {
        System.out.println("encode invoked");
        System.out.println(msg);
        out.writeLong(msg);
    }
}
客户端:
public class Myclient {
    public static void main(String[] args) throws InterruptedException {
        EventLoopGroup eventLoopGroup = new NioEventLoopGroup();
        try {
            Bootstrap bootstrap = new Bootstrap();
            bootstrap.group(eventLoopGroup).channel(NioSocketChannel.class).handler(new MyClientIniatializer());
            ChannelFuture channelFuture = bootstrap.connect("localhost", 8899).sync();
            channelFuture.channel().writeAndFlush("hello");
            channelFuture.channel().closeFuture().sync();
        } finally {
            eventLoopGroup.shutdownGracefully();
        }
    }
}
客户端Iniatializer:
public class MyClientHandler extends SimpleChannelInboundHandler<Long> {
    @Override
    protected void channelRead0(ChannelHandlerContext ctx, Long msg) throws Exception {
        System.out.println(ctx.channel().remoteAddress());
        System.out.println("client output "+msg);
    }

    @Override
    public void channelActive(ChannelHandlerContext ctx) throws Exception {
        ctx.writeAndFlush(123456L);
    }

    @Override
    public void exceptionCaught(ChannelHandlerContext ctx, Throwable cause) throws Exception {
        super.exceptionCaught(ctx, cause);
        ctx.close();
    }
}
运行服务端,之后运行客户端:
服务端输出结果:
MyReplayingDecoder decode invoked!
/127.0.0.1:4448 --> 123456
encode invoked
654321
客户端输出结果:
encode invoked
123456
MyReplayingDecoder decode invoked!
localhost/127.0.0.1:8899
client output 654321
至于为什么是这样的输出结果,这里就不去做详细走读了,现在看一下ReplayingDecoder的javadoc:
A specialized variation of ByteToMessageDecoder which enables implementation of a non-blocking decoder in the blocking I/O paradigm.
The biggest difference between ReplayingDecoder and ByteToMessageDecoder is that ReplayingDecoder allows you to implement the decode() and decodeLast() methods just like all required bytes were received already, rather than checking the availability of the required bytes. For example, the following ByteToMessageDecoder implementation:
一个特殊的ByteToMessageDecoder ,可以在阻塞的i/o模式下实现非阻塞的解码。
ReplayingDecoder 和ByteToMessageDecoder 最大的不同就是ReplayingDecoder 允许你实现decode()和decodeLast()就像所有的字节已经接收到一样,不需要判断可用的字节,举例,下面的ByteToMessageDecoder 实现:
public class IntegerHeaderFrameDecoder extends ByteToMessageDecoder {

    @Override
   protected void decode(ChannelHandlerContext ctx,
                           ByteBuf buf, List<Object> out) throws Exception {

     if (buf.readableBytes() < 4) {
        return;
     }

     buf.markReaderIndex();
     int length = buf.readInt();

     if (buf.readableBytes() < length) {
        buf.resetReaderIndex();
        return;
     }

     out.add(buf.readBytes(length));
   }
 }
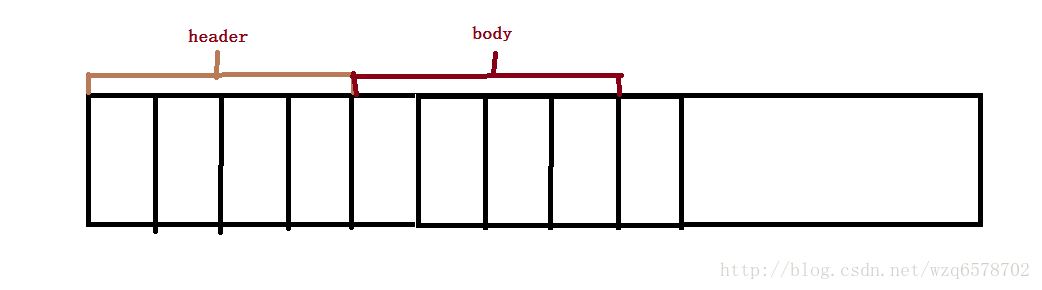
这段代码表达的意思是先读取前边4隔壁字节(即,一个int类型),然后再去读取后边个字节,如果前边四个字节无法读取,直接返回,如果可以读取前四个字节,那么紧接着读取同样长度个字节,这种方式是一种消息头,消息体的协议模型,先读取消息头,之后再去读取消息体:
好了先说到这里,协议以后再讨论,那现在我们使用ReplayingDecoder可以简化为:
is simplified like the following with ReplayingDecoder:
public class IntegerHeaderFrameDecoder
      extends ReplayingDecoder<Void> {

   protected void decode(ChannelHandlerContext ctx,
                           ByteBuf buf) throws Exception {

     out.add(buf.readBytes(buf.readInt()));
   }
 }
How does this work?
ReplayingDecoder passes a specialized ByteBuf implementation which throws an Error of certain type when there’s not enough data in the buffer. In the IntegerHeaderFrameDecoder above, you just assumed that there will be 4 or more bytes in the buffer when you call buf.readInt(). If there’s really 4 bytes in the buffer, it will return the integer header as you expected. Otherwise, the Error will be raised and the control will be returned to ReplayingDecoder. If ReplayingDecoder catches the Error, then it will rewind the readerIndex of the buffer back to the ‘initial’ position (i.e. the beginning of the buffer) and call the decode(..) method again when more data is received into the buffer.
Please note that ReplayingDecoder always throws the same cached Error instance to avoid the overhead of creating a new Error and filling its stack trace for every throw.
这是怎样完成的?
当ReplayingDecoder 接收的buffer的数据不足时,会抛出一个异常,ReplayingDecoder 通过一个ByteBuf 的具体实现来完成。在上边的IntegerHeaderFrameDecoder ,当你调用buf.readInt().你就假设在buffer里边有4个字节,如果里边确实有4个字节,它将会返回一个整型的头,就像你期望的一样,否则,将会抛出一个Error并且控制会返回到ReplayingDecoder,如果ReplayingDecoder扑捉到这个错误,然后他就会将读的索引重置到刚开始的位置(buffer的开始位置),之后再次调用decode方法当数据继续进入buffer的时候。
请注意ReplayingDecoder 总是返回一个缓冲的Error 的实例,,来避免创建新的Error对象和每次填充堆栈的负担。
Limitations
At the cost of the simplicity, ReplayingDecoder enforces you a few limitations:
Some buffer operations are prohibited.
Performance can be worse if the network is slow and the message format is complicated unlike the example above. In this case, your decoder might have to decode the same part of the message over and over again.
You must keep in mind that decode(..) method can be called many times to decode a single message. For example, the following code will not work:
限制
简化使用带来的成本,ReplayingDecoder 强制带来了2个限制:
- 一些buffer 的操作是被禁止的
- 如果网络过慢并且消息的格式复杂不像上边提到的那种简单的例子,会导致性能下降。在这种情况下,你的解码器就会一遍又一遍解码一个消息的同一个部分。
- 你必须要记住decode方法为了解码一个消息可能别调用多次,下面的情况是不能工作的。
public class MyDecoder extends ReplayingDecoder<Void> {

   private final Queue<Integer> values = new LinkedList<Integer>();

    @Override
   public void decode(.., ByteBuf buf, List<Object> out) throws Exception {

     // A message contains 2 integers.
     values.offer(buf.readInt());
     values.offer(buf.readInt());

     // This assertion will fail intermittently since values.offer()
     // can be called more than two times!
     assert values.size() == 2;
     out.add(values.poll() + values.poll());
   }
 }
上边的方式当中,假如走到第二个values.offer(buf.readInt());时候抛出了异常,下边的逻辑就不会走,但是values 里边已经有一个消息了,当下次再调用decode方法的时候(加入过来了2条数据),那么assert values.size() == 2;永远都不会通过,因为加上之前的一条现在values里边是三条数据。
The correct implementation looks like the following, and you can also utilize the ‘checkpoint’ feature which is explained in detail in the next section.
正确的实现应该是下边这样的方式
public class MyDecoder extends ReplayingDecoder<Void> {

   private final Queue<Integer> values = new LinkedList<Integer>();

    @Override
   public void decode(.., ByteBuf buf, List<Object> out) throws Exception {

     // Revert the state of the variable that might have been changed
     // since the last partial decode.
     values.clear();//首先要清理掉里边的消息

     // A message contains 2 integers.
     values.offer(buf.readInt());
     values.offer(buf.readInt());

     // Now we know this assertion will never fail.
     assert values.size() == 2;
     out.add(values.poll() + values.poll());
   }
 }
Improving the performance
性能提升
Fortunately, the performance of a complex decoder implementation can be improved significantly with the checkpoint() method. The checkpoint() method updates the ‘initial’ position of the buffer so that ReplayingDecoder rewinds the readerIndex of the buffer to the last position where you called the checkpoint() method.
幸好,复杂解码器性能的提升可以通过checkpoint()方法实现,checkpoint()方法可以更新buffer的初始化的位置,这样ReplayingDecoder 就可以在调用checkpoint()方法的时候重新回到上一次读索引的位置。
Calling checkpoint(T) with an Enum
Although you can just use checkpoint() method and manage the state of the decoder by yourself, the easiest way to manage the state of the decoder is to create an Enum type which represents the current state of the decoder and to call checkpoint(T) method whenever the state changes. You can have as many states as you want depending on the complexity of the message you want to decode:
通过枚举调用索引,尽管你可以自己使用checkpoint()方法来管理decoder的状态,最易用的方式就是使用枚举来管理decoder的状态,这个枚举代表了当前decoder的状态,当状态改变时可以调用checkpoint()方法,你可以有很多状态取决于你想解码的消息的复杂度。
public enum MyDecoderState {
 //假设消息有2种状态,读取长度状态和读取内容的状态。
   READ_LENGTH,
   READ_CONTENT;
 }

 public class IntegerHeaderFrameDecoder
      extends ReplayingDecoder<MyDecoderState> {

   private int length;

   public IntegerHeaderFrameDecoder() {
     // Set the initial state.
     super(MyDecoderState.READ_LENGTH);
   }

    @Override
   protected void decode(ChannelHandlerContext ctx,
                           ByteBuf buf, List<Object> out) throws Exception {
     switch (state()) {
     case READ_LENGTH:
       length = buf.readInt();
       checkpoint(MyDecoderState.READ_CONTENT);
       //注意这里没有break,也就是说接下来就是进入READ_CONTENT的代码块,执行读取内容的逻辑
     case READ_CONTENT:
       ByteBuf frame = buf.readBytes(length);
       checkpoint(MyDecoderState.READ_LENGTH);
       out.add(frame);
       break;
     default:
       throw new Error("Shouldn't reach here.");
     }
   }
 }
Calling checkpoint() with no parameter
An alternative way to manage the decoder state is to manage it by yourself.
没有参数调用checkpoint()方法:
另外一种管理decoder的方式是自己管理decoder状态:
public class IntegerHeaderFrameDecoder
      extends ReplayingDecoder<Void> {

   private boolean readLength;
   private int length;

    @Override
   protected void decode(ChannelHandlerContext ctx,
                           ByteBuf buf, List<Object> out) throws Exception {
     if (!readLength) {
       length = buf.readInt();
       readLength = true;
       checkpoint();
     }

     if (readLength) {
       ByteBuf frame = buf.readBytes(length);
       readLength = false;
       checkpoint();
       out.add(frame);
     }
   }
 }
Replacing a decoder with another decoder in a pipeline
在管道中用另外一个decoder替换一个decoder
If you are going to write a protocol multiplexer, you will probably want to replace a ReplayingDecoder (protocol detector) with another ReplayingDecoder, ByteToMessageDecoder or MessageToMessageDecoder (actual protocol decoder). It is not possible to achieve this simply by calling ChannelPipeline.replace(ChannelHandler, String, ChannelHandler), but some additional steps are required:
如果你想写一个协议组件,你可能替换一个ReplayingDecoder (协议探测者)用另外的ReplayingDecoder、ByteToMessageDecoder 或者MessageToMessageDecoder (实际的解码器),
你不可能简单的通过调用ChannelPipeline.replace(ChannelHandler, String, ChannelHandler)来实现,但是一些额外的步骤是需要的:
public class FirstDecoder extends ReplayingDecoder<Void> {

     @Override
     protected void decode(ChannelHandlerContext ctx,
                             ByteBuf buf, List<Object> out) {
         ...
         // Decode the first message
         Object firstMessage = ...;

         // Add the second decoder
         ctx.pipeline().addLast("second", new SecondDecoder());

         if (buf.isReadable()) {
             // Hand off the remaining data to the second decoder
             out.add(firstMessage);
             out.add(buf.readBytes(super.actualReadableBytes()));
         } else {
             // Nothing to hand off
             out.add(firstMessage);
         }
         // Remove the first decoder (me)
         ctx.pipeline().remove(this);
     }
不需要状态管理的时候不需要Void泛型。
另外上文提到的MessageToMessageDecoder解码器在这里不做详细介绍,主要是实现消息到消息的解码,可以去git看具体使用方式。
除了编码器很解码器之外还有既是解码器又是编码器的:MessageToMessageCodec(继承的方式)、CombinedChannelDuplexHandler(组合方式),那么我们在实际开发的时候怎么选择呢,根据单一职责设计原则,尽量是要分开。
几种常见的 解码器:
延伸阅读:
【强烈推荐,看“分包传输”部分】 netty codec FrameDecoder ReplayingDecoder 编解码