- Typora官网下载 F1:打开命令面板
- -----------------------------------------------
- Typora Plugin:Typora 插件,功能增强工具 (注:没有Mac版,可惜了)
- Typora Community Plugin:一个适用于 Typora 的社区插件系统。受到 Obsidian 插件系统 启发
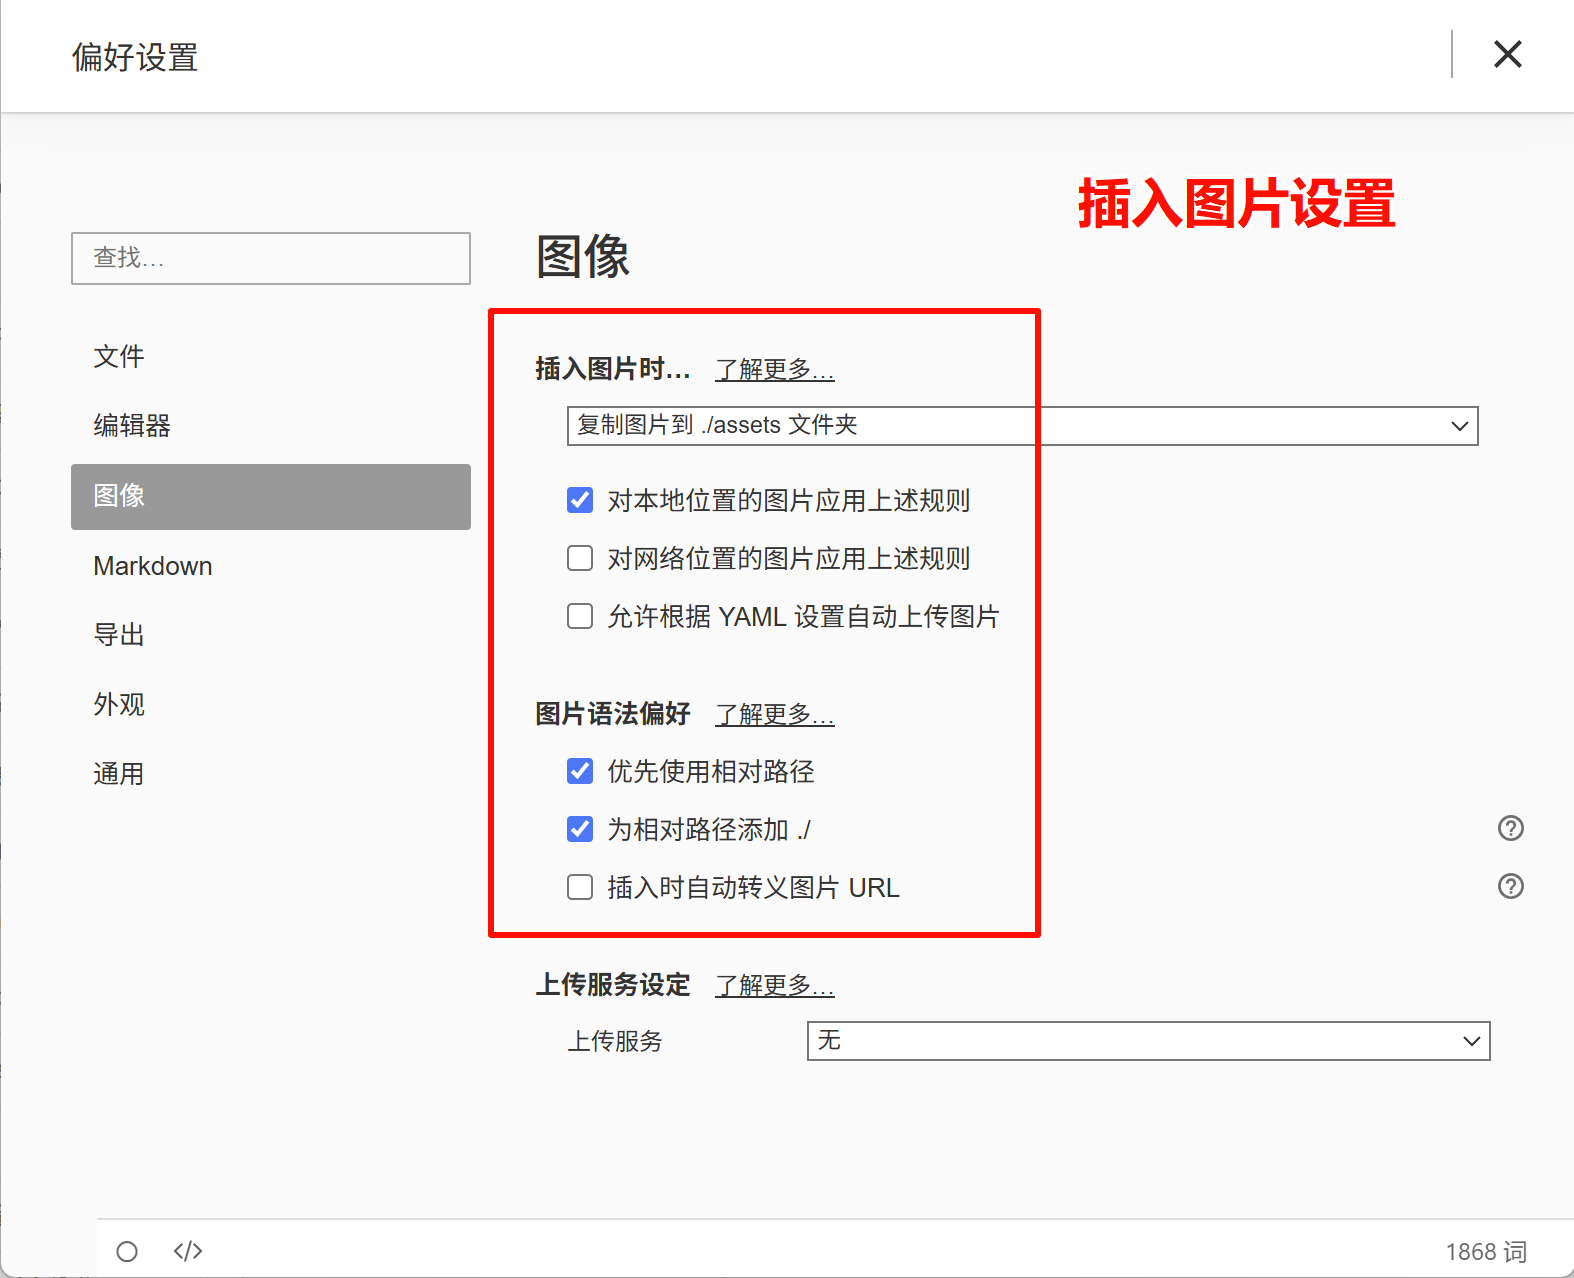
1. 上传图片的功能设置
2. 问题描述:Markdown预览模式,如何显示 H1,H2,H3 等标签?
Typora 预览模式默认不显示 H1/H2 等标签,需要通过 自定义 CSS 实现永久显示,或用 源代码模式 临时查看。
解决方案:永久显示 H1/H2 标签(推荐)
1. 打开自定义 CSS 入口
- Windows/Linux:文件 → 偏好设置 → 外观 → 打开主题文件夹
- macOS:Typora → 设置 → 外观 → 打开主题文件夹
2. 编辑 CSS 文件
在主题文件夹中,找到当前使用的主题 .css 文件(如 github.css),添加以下代码: 【调试技巧:按0.05em为最小单位 增加/减少微调】
(1)Windows版:
/* 预览模式显示 H1-H6 标签 */
#write h1::before { content: "H1 "; color: #ccc; font-size: 16px; margin-left: -35px;margin-right: 10px;}
#write h2::before { content: "H2 "; color: #ccc; font-size: 16px; margin-left: -35px;margin-right: 10px;}
#write h3::before { content: "H3 "; color: #ccc; font-size: 16px; margin-left: -34px;margin-right: 10px;}
#write h4::before { content: "H4 "; color: #ccc; font-size: 16px; margin-left: -34px;margin-right: 10px;}
#write h5::before { content: "H5 "; color: #ccc; font-size: 16px; margin-left: -34px;margin-right: 10px;}
#write h6::before { content: "H6 "; color: #ccc; font-size: 16px; margin-left: -34px;margin-right: 10px;}
/* 行内代码 */
code {padding:3px !important;}
(2)Mac版:
/* 预览模式显示 H1-H6 标签 */
#write h1::before { content: "H1 "; color: #ccc; font-size: 16px; margin-left: -35px;margin-right: 10px;}
#write h2::before { content: "H2 "; color: #ccc; font-size: 16px; margin-left: -35px;margin-right: 10px;}
#write h3::before { content: "H3 "; color: #ccc; font-size: 16px; margin-left: -34px;margin-right: 10px;}
#write h4::before { content: "H4 "; color: #ccc; font-size: 16px; margin-left: -34px;margin-right: 10px;}
#write h5::before { content: "H5 "; color: #ccc; font-size: 16px; margin-left: -34px;margin-right: 10px;}
#write h6::before { content: "H6 "; color: #ccc; font-size: 16px; margin-left: -34px;margin-right: 10px;}
/* 行内代码 */
code {padding:3px !important;}
3. 重启 Typora
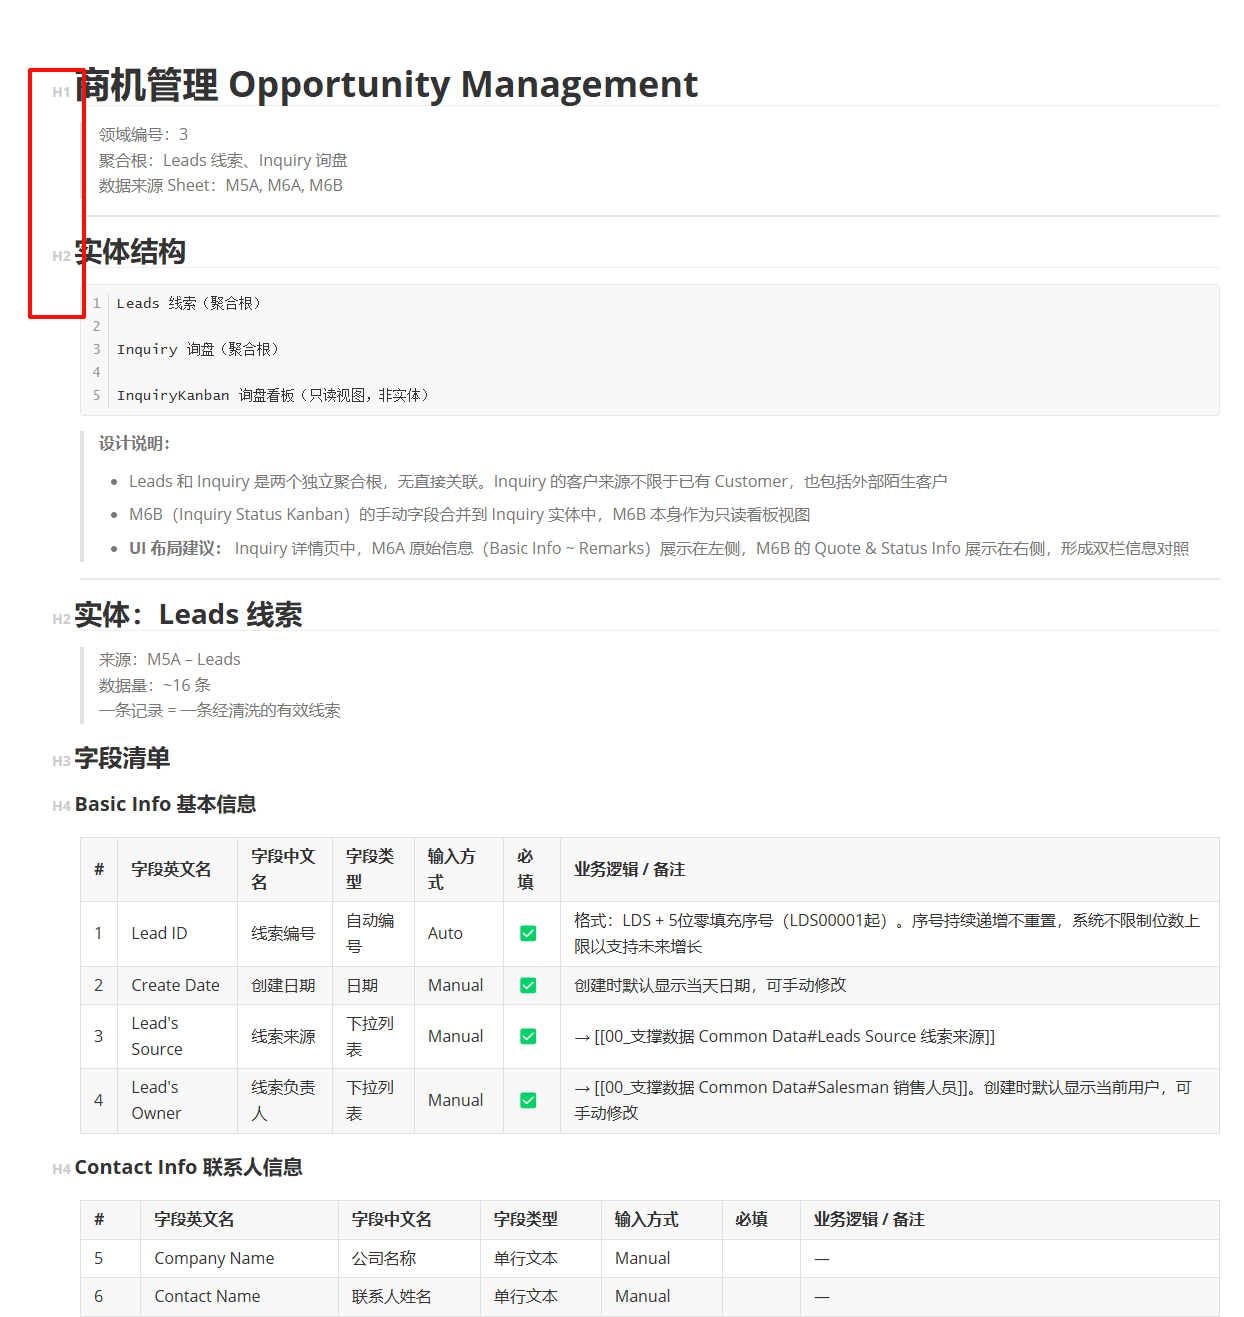
关闭并重新打开 Typora,预览模式下标题前会显示 H1/H2 等标签。
4. 显示效果
3. 关闭“拼写检查”
菜单 -> 编辑 -> 拼写检查 -> 不使用拼写检查